

Blogger launched Reactions as an alternative to the comment form to easily engage your readers to get feedback about posts. It includes simple annotations chosen by author and displayed on the post footer. Reactions element helps you retrieve more feedback as it needs few clicks to show readers' response. Blogger enables you to customize your annotations easily but I would like to go through it again and make this post fruitful for everyone. In addition, as my main consideration, I would like to share about how to move your reactions element away from the post footer and display elsewhere on your blog. Would you like to know how?
As you reading through this post, you will be able to learn following,
● How to Enable Reactions and Change it's Annotations
● How to Move Reactions Element from Post Footer
How to Enable Reactions on a Post and Change its Annotations
Here you can learn how to enable and arrange Reactions element on your post footer and change it's annotations as you prefer.
Steps:
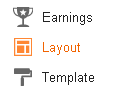
iii. Now jump to Layout tab.
iv. Find Blog Posts element.
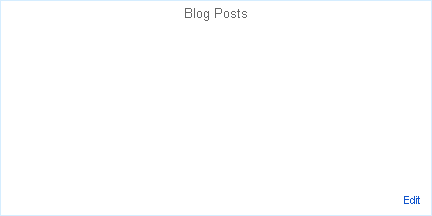
v. Now click Edit link correspond to Blog Posts element.
vi. There you can find Reactions option under Post Page Options. Tick the check box correspond to Reactions to enable Reactions element on post footer. Else it will be disabled.
vii. You can enter the label to be displayed before annotations in the text box and you will find a Edit link at the end of that options. Click Edit link to change annotations and Save when you finish editing.
viii. Then scroll down and find Arrange Items heading. Below you can drag and arrange your Reactions element as you prefer.
ix. When you're done, click Save.
x. Now click on Save arrangement button.
How to Move Reactions Element from Post Footer
By default Blogger let you arrange or place your reactions element on post footer only. But if you are trying to get rid of post footer and wanna have reactions element to have feedback or just wanna move your Reactions element to somewhere else on the page, this tip will be really useful for you.
Note: If you are trying this while post footer enabled below your posts, please disable Reactions from your post footer if you are not wish to display Reactions element on two places simultaneously. Else you can leave it. You can refer above tip - How to Enable Reactions on a Post and Change it's Annotations to find your Reactions element option and disable it.
Steps:
i. Go to Blogger Dashboard.
ii. Click on your Blog Title.
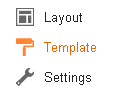
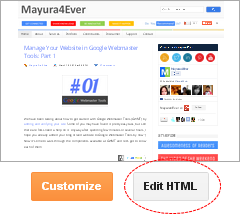
iii. Now navigate to Template tab.
Note: Before editing your template, you may want to save a copy of it. Read How to Back Up Your Template.
iv. Click Edit HTML button.
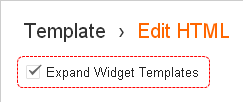
v. Make sure to tick on Expand Widget Templates option.
vi. Now you need to paste below Reactions element code at the place where you want it to be appeared. Read How to Position Elements on a Blogger Post Page to place your Reactions element at correct place as you prefer.
Note: Whether your Reactions element is enabled or disabled, from your post footer, you can change your annotations from the place where we used to change them. You can refer above subtitle - How to Enable Reactions on a Post and Change it's Annotations if you are unable to find Reactions options.
<table width='100%'><tr valign='top'><td>[Label]</td><td>
<iframe allowtransparency='true' class='reactions-iframe' expr:src='data:post.reactionsUrl' frameborder='0' name='reactions' scrolling='no'/></td></tr></table>
Color Indication Information
- Label of Reactions Element
This is the preceding label you can see on typical Reactions element. Add your own label here to appear it before your reaction annotations. If you prefer Reactions element without a label, then leave it blank.
vii. Now Save your template.
vii. Now Save your template.
Enjoy :-)
