

We do many experiments in Blogger. Mostly we are seeking for widgets and add them, try applying custom templates and do more stuff with the template on our blog. After going through all smart and hard work to customize and craft your template, you would never wanna lose your customization. But when you deal with your template or make changes to your template, what if something goes wrong?
Nothing goes wrong until something goes wrong. So you can't predict about what is gonna happen next. When you edit your template or add external widgets to your blog, there could be something goes wrong with HTML or sort of code inserted into your template. Therefore it's recommended to take preventive action before something happen to your template. We know how much you care about your blog. So as a preventive measure, Blogger provides you features to backup your template.
In addition to back up, you can use restore feature to restore your previously backed up template again. Restore feature also used when installing a new template to your blog too. Let's see how to make use of back up and restore features.
In addition to back up, you can use restore feature to restore your previously backed up template again. Restore feature also used when installing a new template to your blog too. Let's see how to make use of back up and restore features.
Back Up Your Template
Your widgets, headers and all the source code related to template will be backed up here. However it doesn't back up your posts and images used in posts.
i. Go to Blogger Dashboard.
ii. Click on your Blog Title.
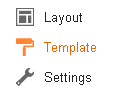
iii. Navigate to Template tab.
iv. Click on Backup/Restore button on top right.
v. Click Download full template button and you will have a backup copy of your template in XML format (.xml). Keep it in a safe place.
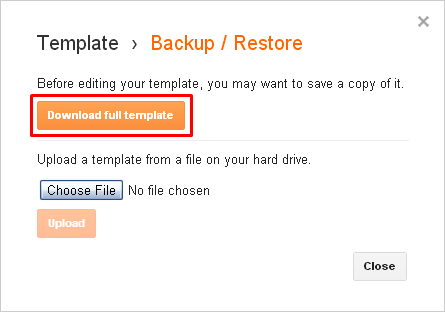
vi. Close the pop up.
v. Click Download full template button and you will have a backup copy of your template in XML format (.xml). Keep it in a safe place.
vi. Close the pop up.
Restore Your Template
It's all about restoring your previously saved template or installing a new template on your blog.
i. Go to Blogger Dashboard.
ii. Click on your Blog Title.
iii. Jump to Template tab.
iv. Click on Backup/Restore button on top right.
iv. Click on Backup/Restore button on top right.
iv. On the pop up you will find Choose File button and click on it. Browse for your backup XML template file (.xml) and click Open button after selecting it.
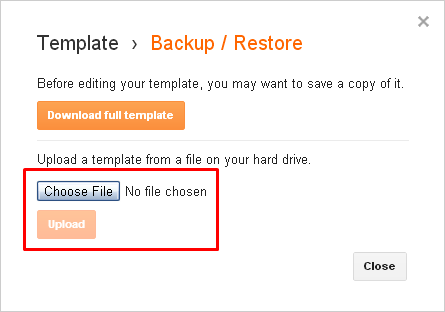
v. Now click Upload button.
vi. Close the pop up, after the restoration of your template.
Enjoy :-)

Sadly it took me hours to find where to position the Html for Pinterest. I'm more of a visual person, I think it would had helped to see a video. But I finally got it and I appreciate this post. Thanks.
You are welcome dear :) Glad you figured it out finally... BTW do not hesitate to drop your query if you've got any problem...
Cheers...
Thanks for a handy tutorial
You're welcome Jo :)