


How much do you care about your blog design? Do you design it by yourself or use a custom template designed by someone else? However it's up to you to decide whether to use official Blogger templates or custom templates. The look and feel of your blog goes with your taste and creativity. Eventhough you satisfies with your template, later on you may wanna make some changes to enhance your blog design and to give it a new look. For example, assume you wanna change page text and its color. In such a situation, do you wanna contact your template designer to make these changes for you?
Absolutely not. Blogger has extended its template design capabilities for you and made it further more simple. Blogger let you customize fonts, colors and backgrounds of your blog easily via a single interface - Blogger Template Designer. So even if you have no HTML or Cascade Styling Sheet (CSS) knowledge, still you can create the perfect look for your blog. Blogger expanded capability of customization and breaks the limitations. Now it includes wide range of stylish font selection to make your blog design more stylish and modernize. Blogger Template Designer Advanced settings allows you to customize page text, backgrounds, links, tabs, titles and other elements in your template.
Steps:
1. Navigate to Blogger Dashboard.
2. Click on your Blog Title.
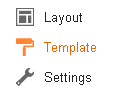
3. Navigate to Template from left pane.
Note: Before editing your template, you may want to save a copy of it. Read How to Back Up Your Template.
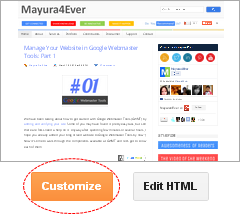
4. Now click on Customize button underneath your blog preview.
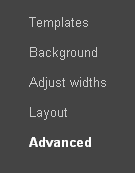
5. Now you will be directed to the Blogger Template Designer. Then jump to Advanced section.
6. Now here you can customize fonts and colors of different elements on your blog. Below you can find the description for each page element.
Page Text
Here you can change the font used in the blog and color of the text. However this doesn't affect for your text in posts.
Backgrounds
Here you can change background colors of your template - Outer background, Main background and Header background. If you wish to change your background image, read How to Change Your Blogger Background Image and Color.
Links
This section will allows you to change the font and colors of links displayed on your blog.
Blog Title
If you are not using custom header, here you can change the font and color of your blog title displayed in the header.
Blog Description
Your blog description displays along with the blog title on header if you are using standard blog header. So here you can change color of the blog description shown below the blog title.
Tabs Text
Here you can change font and colors of the text displayed on the tabs.
Tabs Background
You can change the background color and selected color of your tabs here.
Post Title
If you wish to change the font of post titles, here you can manage it.
Date Header
If you displaying date header on top of list of posts within the day, you can change font and color of date header.
Post Footer
Here you can manage the properties of post footer such as text color, background color and shadow color.
Gadgets
You can change title of gadgets aka elements here.
Images
Here you can manage borders, background and caption of images used in your blog.
Accents
Here you can change separator line color and tabs border color.
Notes:
* As you change each values, you can see the live preview of your changes on below view pane. Whenever you select an element, the affected area will be shown by a red dashed line.
* If something goes wrong, you can revert changes to default with the help of link displayed at the bottom of each section.
7. If you are not happy with live preview, click View Blog link on top bar to view your blog with the changes you have made in a different browser tab or window.
8. Once you are comfortable with changes you have made, click Apply to Blog button to apply changes permanently.
Enjoy :-)

I have followed your instructions many times on many different browsers. For some reason I can do all the changes in template and it even says template applied after I select Apply Template but it will not show up on my blog. Any ideas as to what I have set wrong?
Hi Vanessa,
Could you please try out resetting widget templates to default and see if it helps next time you apply changes :)
Cheers...
hey , do you know hot to make tabs to be centered ?
Hi Eugeniu,
I'm not sure about that exactly mate :) I hope you are not referring to custom tabs on sites. However I ll check and reply if it's possible for me.
Cheers...