


Have you ever attached images in your posts? Most probably the answer would be 'Yes'. But after publishing your post, you may have seen that your image has a shadow and a thick border around it. Sometimes you may wonder how it appears after publishing the post, 'cause if you go back and edit your post again, you won't find any border or shadow there. So you have nothing to do at the Post Editor to remove border or shadow. You may find no clue about that. But that shadow and border appears around your images may still bugging you. Are you still wondering how to get rid of such shadow and border appears on your images in Blogger?

The above picture shows you what exactly I'm talking here. Do you see white border and shadow around the image? Yeah, that's how it appears. The reason is in some Blogger blog templates, there are default CSS styles defined for images. So if your template is one of it, it will add this border and shadow for each and every image you add to your posts. It renders when you view your blog but not in Post Editor. As I said, the cause is CSS styles and the solution would be changing default values. Then you can get rid of this shadow and border around your template. So let me help you to show you how to change your image style values defined in your blog template.
Steps:
1. Go to Blogger Dashboard.
2. Click on your Blog Title.
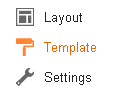
3. Navigate to Template tab from left pane.
Note: Before editing your template, you may want to save a copy of it. Read How to Back Up Your Template.
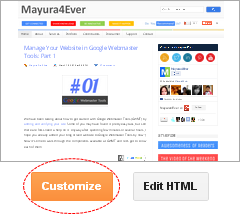
4. Click on Customize button.
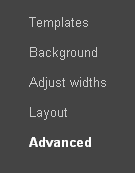
5. Now you will be directed to Template Designer. Jump to Advanced.
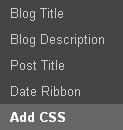
6. On the next pane, click on Add CSS tab.
7. Now add following CSS style code snippet in the text area you find on the right pane.
.post-body img {
padding: 0px !important;
background: none !important;
border: 0px solid $(image.border.color) !important;
moz-box-shadow: 1px 1px 5px rgba(0, 0, 0, 0);
-webkit-box-shadow: 1px 1px 5px rgba(0, 0, 0, 0);
box-shadow: 1px 1px 5px rgba(0, 0, 0, 0);
}
padding: 0px !important;
background: none !important;
border: 0px solid $(image.border.color) !important;
moz-box-shadow: 1px 1px 5px rgba(0, 0, 0, 0);
-webkit-box-shadow: 1px 1px 5px rgba(0, 0, 0, 0);
box-shadow: 1px 1px 5px rgba(0, 0, 0, 0);
}
Color Indication Information
- Image Border Width in Pixels
8. Click Apply to Blog button to make changes.
Enjoy :-)

I followed your instructions, the photos I use still have a white border...
Hi Jaimie,
You have removed border. It's padding what you seeing now. I have changed the code here. Go through it again and make changes.
Cheers...
It wasn't the code I had to change; I went to the customization options and just changed the border to my background color. But thanks anyway. :)
Yeah :) Either way can work out mate. Glad you sort it out that way.
Cheers...
Wow thanks so much:) This is perfect! Took a while for me to find that bit of code, but when I did it worked wonderfully:)
Hello Mayura thanks for this tut.
I want to remove background, border and shedow only on one .png image in one post.
Is this possible?
You're welcome mate :) Unfortunately, the method we discussed here applies to the entire template. Hence can't exclude one specific image. But it's possible by setting a custom CSS just for that image.
I'm sorry, but did you mention that you figured it out? I hope your post scriptum implied so :)
I
figured it out. Put one class on image and evrithing put on 0 and
none - !important (on code
which are you post in a tutorijal for .post-body img).
..
Awesome! Glad you figured it out mate :) Thanks for sharing how you did it too.