


Google, the search giant, has introduced their own social platform Google+ and it has a peculiar feature known as +1 button. Now it's more popular among most blogs/websites as it affects organic Google search results. Google +1 button is a way to recommend content for your friends and followers. Once you recommend a content appears on the web with +1 button, your friends will be able to see it with your recommendation across the web. As it enables your site to get recommended on search, most of webmasters was eager to implement +1 button on their respective websites and blogs. As a blogger, I don't think you gonna say NO for it. Would you like to implement Google +1 button for your posts too?
You have learnt how to set up Google +1 button for your website. But it's only represent your entire website or blog as one entity, not individual content. So if you wish to implement Google +1 button for your posts, then you need to implement them for each post individually. But unfortunately, editing each post is far more time consuming in Blogger and it's not a practical solution either. But on the other hand, here you can implement it for all your posts easily without wasting your valuable time. Let's learn how to implement Google +1 button for each of your post without even affecting your page load time.
Before You Go:
* If you wanna add Google +1 button to be displayed on all your pages, read How to Add Google +1 Button in Blogger.
Before You Go:
* If you wanna add Google +1 button to be displayed on all your pages, read How to Add Google +1 Button in Blogger.
Steps:
1. Go to Blogger Dashboard.
2. Click on your Blog Title.
3. Now navigate to Template tab.
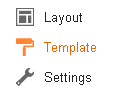
Note: Before editing your template, you may want to save a copy of it. Read How to Back Up Your Template.
3. Now navigate to Template tab.
Note: Before editing your template, you may want to save a copy of it. Read How to Back Up Your Template.
4. Click on Edit HTML button.
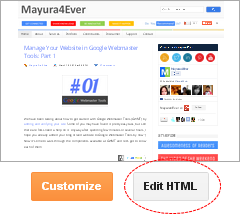
5. Now right before the </body> tag, place below asynchronous Google +1 button script which loads +1 button without affecting page load time.
<script type="text/javascript">
window.___gcfg = {lang: 'en'};(function()
{var po = document.createElement("script");
po.type = "text/javascript"; po.async = true;po.src = "https://apis.google.com/js/plusone.js";
var s = document.getElementsByTagName("script")[0];
s.parentNode.insertBefore(po, s);
})();</script>
Color Indication Information
- Language Code
The Default language associated with +1 button is English (US). If you prefer to use another available language, find language code from +1 Button Language Codes page and replace value here.
The Default language associated with +1 button is English (US). If you prefer to use another available language, find language code from +1 Button Language Codes page and replace value here.
6. Search for <data:post.body/> tag and add one of following button codes right after that, in a new line. There is four types of +1 buttons categorized by size. You can either use Standard +1 tag or HTML5-valid +1 tag.
Notes:
* Adding below <data:post.body/> will place your button under the post. If you need to place it elsewhere on post page, read How to Position Elements on a Blogger Post Page.
* You may encounter two search results for <data:post.body/>. Add this code right after the first resulted line of code.
* Adding below <data:post.body/> will place your button under the post. If you need to place it elsewhere on post page, read How to Position Elements on a Blogger Post Page.
* You may encounter two search results for <data:post.body/>. Add this code right after the first resulted line of code.
Small

Standard +1 Tag
<g:plusone expr:href="data:post.url" size="small" annotation="bubble"></g:plusone>
HTML5-valid +1 Tag
<div class="g-plusone" expr:data-href="data:post.url" data-size="small" data-annotation="bubble"></div>
Medium

Standard +1 Tag
<g:plusone expr:href="data:post.url" size="medium" annotation="bubble"></g:plusone>
HTML5-valid +1 Tag
<div class="g-plusone" expr:data-href="data:post.url" data-size="medium" data-annotation="bubble"></div>
Standard

Standard +1 Tag
<g:plusone expr:href="data:post.url" annotation="bubble"></g:plusone>
HTML5-valid +1 Tag
<div class="g-plusone" expr:data-href="data:post.url" data-annotation="bubble"></div>
Tall

Standard +1 Tag
<g:plusone expr:href="data:post.url" size="tall" annotation="bubble"></g:plusone>
HTML5-valid +1 Tag
<div class="g-plusone" expr:data-href="data:post.url" data-size="tall" data-annotation="bubble"></div>
Color Indication Information
- Button Annotation


- Button Annotation
Here you can change annotation of your +1 button. By default, Google +1 button use bubble annotation. Additionally you can specify inline or no annotation. Select your preferred annotation and specify corresponding value here.
Note: Here annotation styles displayed with standard size button, just to demonstrate.
Bubble Annotation
Annotation Value: bubble
No Annotation
Annotation Value: none
Inline Annotation

Annotation Value: inline
If you are using inline annotation with your +1 button, it enables you to specify the width for button and inline annotation. Just add width attribute into your +1 button code as below and specify preferred width in pixels.
Standard +1 Tag - <g:plusone width="400" ...
HTML5-valid +1 Tag - <div class="g-plusone" data-width="400" ...
7. Now save your template and check individual posts for Google +1 button.
More Information:
* If you wanna customize Google +1 button share snippet, read How to Customize Google +1 Button Snippet in Blogger.
Enjoy :-)
