

Did you ever wanted to send out a special message or notify about something special for your blog or website visitors? Ohw... I see... What kind of? Let me think... Imagine you are an blogger and you have published a new book about social media marketing. So you wanna let your blog visitors know about it. Let's think of another example. Imagine you have added a new feature for your website, product or service you offer and wanna tell about it to your audience. See, eventhough you manage a blog or website, you can have something special for your audience. Let's face it. So how you gonna tell them about it? Send them a newsletter? Spread news about it on Facebook, Twitter, Google+ or other engaging social networks? But what about those who land on your site that has no contact with you?
Grab Attention...
You may have something new or which might seems interesting for visitors land on your blog or website. There are usually known ways to promote about something you have got. Social networks are popular nowadays for promotional activities. However you can never forget about your blog or website visitors. Usually you can inform them with a banner or via a blog post if you have a blog. But the problem is, will it catch eyes of your visitors? I mean, grab their attention. As you might know already, when you promote something and as you wanna catch their eyes on it, you got to specific about the place you gonna show it off for your visitors. Mmmm... At the bottom of your site? No... Never. I think you kidding me. Many of visitors never know about it. Don't try it. Sidebars can be better. In addition to the content they come for, you have to make sure it's attention grabbing. What about top of your blog or website? Once someone visit your site, unwittingly they will take a look at top of your site. That's a place where you can count for. But as I've said, you gotta catch their eyes. So, you gonna create a attention grabbing whole new banner or widget or something like that to display top of your site? It may worth it, but you don't need it.
What Can You Go For?
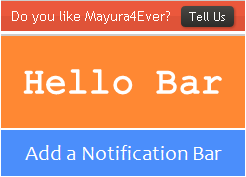
I'm gonna tell you about Hello Bar which helps you to grab attention of your visitors with its sleeky design and simple functionality. You can create a bar with a notification for your visitors with Hello Bar. Further you can include a link with your message if you want them to click on it and check it out. However the message or notification should be something worthy or catchy for your visitors that they might like to check out. For example, you can ask them to subscribe for your newsletter using this notification bar. But most would ignore it as it's not surprising and appealing for them. But if you have a something, like a new free product you can offer for your visitors, then notification bar will perfectly match for you as much as they need your product. So you just need to activate creative thinking to come up with a message which has user appeal to display on your notification bar.
Free version of Hello Bar only let you have 25 clicks per month. In another words, you can make use of this bar until it counts 25 clicks for your link with free version. If you wanna go for more clicks, you have to use paid version of Hello Bar. However paid version supports more features such as SSL support (Pages with HTTPS), let you save your custom themes, automatic A/B testing and dynamically update your Hello Bar with RSS or Twitter feeds and it's unbranded. But still free version can be really useful for you to convey a special message for your visitors. Ohw you got an another idea how to make use of it? But you may never know about it until you try it out. Shall we?
Steps:
1. Navigate to Hello Bar Sign Up page and sign up using your email address.
2. Check your email for login information and use them to log in to your new account. You will direct automatically to bar creation page.
3. Your bar will come up with a default title. You can edit the title of your bar by clicking on predefined title.

4. Below you can access settings of your bar. Click Settings text to expand and view related settings.
Settings include,
Positioning - Here you can change settings how your bar should be positioned on your website. Typically it will display top of your page and remains at top while scrolling. If you don't wanna show at top while scrolling, set Remains at the top of the page when scrolling? option to No there. Also the bar will take extra space to show by pushing your website down. If you wanna show bar over your page top, set Pushes the page down when opening? to No.
Show - You can let your bar to visible right after loading your page or else you can specify time you needs to delay in seconds. If you don't wanna show bar for some reason, you can select Never here too.
Hide - This option let you auto-hide your bar after some time as you specify. Typically its value is Never and show off bar always on your website. If you need to hide it automatically after some time, specify how much time you need it to be active before hides automatically.
Open link in - Sometimes the link you display on this bar may linked with a page on your website and whenever someone click on the link on bar, you might wanna load it in same browser window. If it's an external page, you may wanna open it in a new browser tab or window. However it's based on your preference. You can specify whether the link should be loaded in same window or in a new window.
Show on Link Page - If the link displayed on your bar linked with a page on your website, then you don't wanna show same message with bar on that page too. If you wanna get rid of bar on that page, then select No here. Else set it to Yes.
Link Display - Here you can customize how your specified link should be displayed on your bar. You can display it as a typical hyperlink or as a button.
Closeable - If you show this bar on top of browser window while scrolling, it may interfere with content displayed on your page. If so, you can let users close it down whenever they needed using this setting and a tab will display if they need to view your bar again.
Wiggle Effect - This will add more color to your bar when users closing and opening tab with wiggle effect on your bar.
Tab display - Here you can specify, where the tab should be displayed after someone closing your bar. You can show it off on left side or right side of window as you prefer.
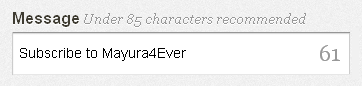
5. Enter a message you wanna display on the bar in Message field and it should be not more than 85 characters.
6. If you wanna show a link with the message, enter URL in Link URL field and appropriate name for link in Link Text field.

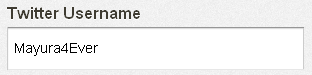
7. Further Hello Bar offers you a cool feature to update your bar message via Twitter. Just enable Allow Twitter Updates option and specify your Twitter handle that you gonna update your bar message with.
Then you just need to tweet as below using your specified account whenever you need to display a new message on your bar.
[Your New Message] [Your Link Text] [Your Link] #HelloBar
Color Indication Information:
- Your New Message
Specify your message here and it should be less than 85 characters.
- Your Link Text
If you wanna show a link with message, enter your link text or label here.
- Your Link
If you wanna show a link and specified link text already, enter your working link or URL here.
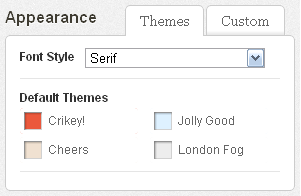
8. Change appearance of your bar under Appearance heading. Either you can make use of predefined themes or change colors of each element under Custom tab.
9. Now you will get embed code for your bar in a pop up box and grab it. Else you can get embed code for your bar at Manage Bars page by clicking Embed button corresponding to bar.
10. Search </body> tag in your template and add embed code snippet for your bar just before </body> tag.
Note: If you are a Blogger user and don't know how to edit your template, read How to Edit Your Blogger Template.
More Information:
* If you wanna stop rendering, delete, change settings, find embed code for your bars or need to create another bar, then navigate to Manage Bars page.
* You can find monthly statistics for your bars at Stats page. Or you can notify statistics for your bars via email. Set your preferences at Stats Email Settings page.
* You can find monthly statistics for your bars at Stats page. Or you can notify statistics for your bars via email. Set your preferences at Stats Email Settings page.
* You can exclude stats for specific IP addresses if you don't wanna show them up in reports. For example, you may don't wanna see your clicks on reports, so you can add your IP address there. If you wanna exclude IP addresses, navigate to Stats IP Exclusions page.
* You can change account settings for Hello Bar at My Account page.
Enjoy :-)

Well that was very helpful Mayura. I use to use a similar bar, not this particular one, but I didn't get any good results from it so I took it down. You know, test test test...
Personally when I land on a site I get them out of the way but I can see if you're new to a blog and then visit it again that you'd like to have those options of clicking through to their offer or perhaps signing up on their list. These are great reminders.
So they do work. Great tips for showing us how to get them all set up.
~Adrienne
Actually, I've had no faith in this bar as it doesn't work out for me earlier, Adrienne. Just few clicks and no result as I expected. But I was amazed after I've set it up for my friend later. He has got good result with this bar.
I think eventhough the bar grab attention of users, the message should be really appealing for them. My friend has published an ebook and he conveys about it via this bar instead of using his blog sidebar. Impressive end result for him.
Usually I keep my sight off from such bars or pop ups when I see it on a website or blog. It's like we see an advertisement on a website, we never bother about. But eventhough it's an advertisement, if it seems really appealing for us, we might check it out. So as you've said "It works" but not for all and not everytime.
Thanks for your compliments and adding your views dear :)
Cheers...
Hey Mayura,
I don't know how to have my picture showing on your blog so, you might get another anonymous face such as Adrienne up there. Have you every thought about getting Commentluv? That's the best blog comment tool, ever, and they have a free version if I'm not wrong. Just a thought I wanted to let you know about.
I had heard about the hello bar before, but never investigated. Thanks for this very good information with all the steps.
Hi Sylviane,
Yeah dear :) As you don't have Blogger profile, it doesn't show up profile picture here. Are you reading my mind? :) I was thinking about implementing CommentLuv here, but it doesn't directly support Blogger as WordPress do. I have to Install IntenseDebate comment system and then they have CommentLuv plugin for it. However I'm just researching about better commenting system as it needs to be compatible with everyone (Mostly Blogger users land here) and able to import old comments.
Hello Bar is really works if you have something to promote dear :) Actually if you have something for your readers, you may try it out to promote.
Thanks for visiting and commenting dear :)
Cheers...