


Do you have favorite blogs or site where you used to find useful content? I hope mostly you tend to find interesting content on the web. Isn't it? So as a Blogger user, you can follow Blogger blogs to get updates right on your dashboard. Else you may subscribe to website updates via feed reader or any other subscription option available. However rather than keeping your interested sites to yourself, would you like to show off what you read using a blogroll for your readers to find them useful?
Ohw... Wondering about the term "blogroll"? Blogroll means a list of other blogs that someone recommends by showing off links to them. Mostly you can find a blogroll on many blogs. Usually bloggers likes to share what they reading or recommend interesting links for their fellow bloggers or readers. Here on Blogger, you can find official widget developed by Blogger to show off your recommended links either from your following blogs or by adding sites manually. By default, your blog list will display most recently updated blogs first or else you can list them in alphabetic order. In addition to providing recommended links, you can display recent posts from respective sites with its thumbnail, snippet and date too. So would you like to recommend some links to your readers via a blogroll?
Steps:
1. Go to Blogger Dashboard.
2. Click on your Blog Title.
3. Navigate to Layout tab from left pane.
4. Click on an Add a Gadget link.

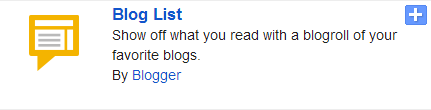
5. Now find and click on Blog List element from gadget list pop up window.
6. Now you will get the configuration window for your Blog List element. Add your favorite sites or blogs you wanna display, by clicking Add to List button. Further you can configure your element with given options. It includes,
* Sorting your blog list by alphabetical order of blog title or show the most recently updated blogs first
* Set up number of blogs you wanna display
* Show favorites icon of respective blogs
* Displaying title, thumbnail and snippet of most recent item aka post
* Showing off date of most recent post
7. Save your element, after configuring it.
8. Now you can arrange your element on the layout by dragging it.
9. If you are done with it, click Save arrangement button.
Enjoy :-)

hey really good post. it helped me a lot. i like this blog very much. thank you for sharing this......
You're welcome Srinath :) Glad to know it helped you out. Thanks for stopping by and for your compliments mate...
Cheers...