

Authorship markup is no longer supported in Google Search.
We almost know Google has been enhancing the search experience and start to show author information along with the search results to attribute the content authors / publishers. You got to know what Google Authorship is all about in that blog post. The authorship markup is very easy to implement, but yet it may tremble some users as it involves with editing the template or theme files. I know, some users don't wanna touch any technical details at all. Are you one of them?
If you are worried about editing your source code, Google came up with another alternative too. There you just need to fill in the information and verify you identity through email. Sounds quite a peaceful process. Isn't it?
If you are worried about editing your source code, Google came up with another alternative too. There you just need to fill in the information and verify you identity through email. Sounds quite a peaceful process. Isn't it?
The Alternative
Now let me explain how it works. Here, Google identifies the authors using their respective email addresses, so the email works as an unique identifier. However, the email address should be originated from same domain. For example, for this blog, it needs to be author@mayura4ever.com or something like that.
Then, on the each authored content, the name of the author should match with the name you have specified in your Google profile. There you need to get used to your real name if you have been using nicknames so far. Once you verify your email address and linked your profile to contributing blogs / websites, Google will identify your content and display author information with search results.
Then, on the each authored content, the name of the author should match with the name you have specified in your Google profile. There you need to get used to your real name if you have been using nicknames so far. Once you verify your email address and linked your profile to contributing blogs / websites, Google will identify your content and display author information with search results.
You need to keep in mind that you have to stick to one email address and in case if you had to switch to another, you have to verify your email again.
Do you prefer this methodology over the previous one we discussed? Proceed to the steps below.
Do you prefer this methodology over the previous one we discussed? Proceed to the steps below.
Before You Go:
* Authors need a Google profile prior to show authorship information in Google search results. If you or contributors have no Google profile, create a new Google profile.
* Make sure the authors have their own domain-specific email address.
* Verify that on each content page, the author name matches with the respective author's Google profile name.
* Make sure the authors have their own domain-specific email address.
* Verify that on each content page, the author name matches with the respective author's Google profile name.
Steps:
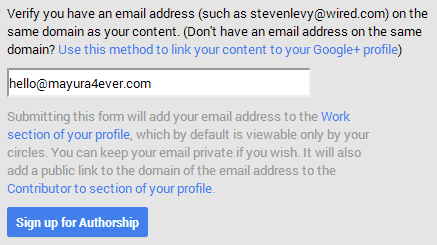
1. Go to Google Authorship page and sign up for authorship by providing your domain-specific email address.
2. Update your Google profiles by adding site URL to the Contributor to section.
3. Now authors need to add and verify their email on their Google profile as below.
4. Now you can use the Structured Data Testing Tool to see preview of author data that Google will extract from content pages and it will display if you have any problem of setting up authorship.
Enjoy :-)
1. Go to Google Authorship page and sign up for authorship by providing your domain-specific email address.
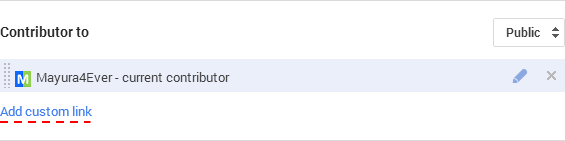
2. Update your Google profiles by adding site URL to the Contributor to section.
How to Add a Contributing Site Link to the Google Profile
a. Go to Google profile.
b. Navigate to About tab.
c. Find Links section, and click corresponding Edit link.
d. Now click Add custom link.
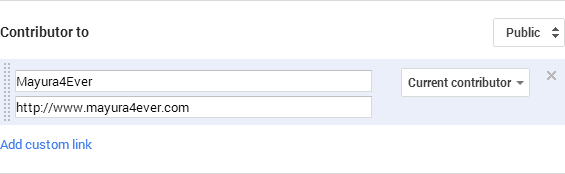
e. Enter site name as Label and URL of site in respective fields.
f. Click Save button.
3. Now authors need to add and verify their email on their Google profile as below.
How to Add a Work Email and Verify on Google Profile
a. Go to Google profile.
b. Navigate to About tab.
a. Go to Google profile.
b. Navigate to About tab.
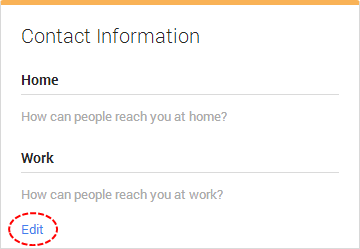
c. Find Contact Information section and click corresponding Edit link.
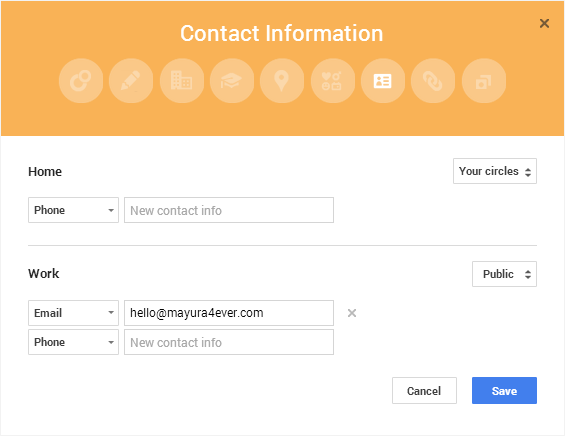
d. Add email address under the Work.
e. Make sure to select visibility of the email as Public.
f. Click Save button.
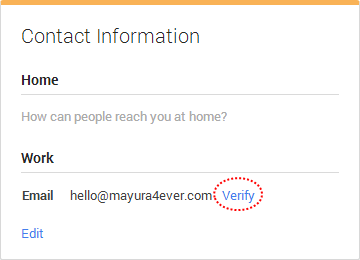
g. Now you will find a Verify link has been added next to your work email address. Click on it and confirm the verification email you receive.
Note: If your email address has been already verified, it won't display any verification link for you.
4. Now you can use the Structured Data Testing Tool to see preview of author data that Google will extract from content pages and it will display if you have any problem of setting up authorship.
Enjoy :-)

I am at step 1 only. What to do. Which content page are you talking about on Blogger.
Content pages mean every post page you have been authored on your blog mate :) You can add that line either at the end of your posts or by editing template, if you're the only author. I've written this tutorial to comply with websites too :)
Cheers...
Oh as a Blogger user, you don't need to do that mate :) Sorry I misread your comment. Just integrate your Google+ profile with Blogger and continue from step 2.
Cheers...