

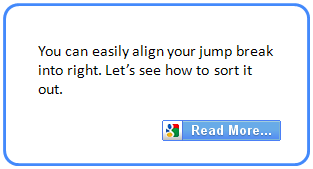
Have you ever seen links such as "Read More..." or "Continue Reading" after landing on a homepage of a blog? In most scenarios, they display a snippet of a post and want you to click on that link to read whole article or story. It's saving space on homepage and able to display more posts to grab more exposure and increase engagement. Also as you make use of jump breaks in Blogger. You can specify which snippet should be displayed on home page and a "Read More..." link will appear after the snippet. Every component displayed on your pages relevant when you think about design of your blog. Typically the jump break link is aligned to left side. Would you prefer to have it other way? I mean, on right side.
Blogger jump break is a hyperlink which directs readers to post page for full post. If you use jump break in your post the above portion would be displayed on homepage and jump break link will direct to the full post page if the visitor interested in reading whole post or story. However, by default, Blogger jump break is left aligned. It may not a problem with you at all. But if you think it would be better if it was right aligned and seems it's more matched to your blog template and design by doing it, you can change the alignment by accessing your blog template easily. If you wish to try it out on your blog, now it's your turn to follow steps.
Blogger jump break is a hyperlink which directs readers to post page for full post. If you use jump break in your post the above portion would be displayed on homepage and jump break link will direct to the full post page if the visitor interested in reading whole post or story. However, by default, Blogger jump break is left aligned. It may not a problem with you at all. But if you think it would be better if it was right aligned and seems it's more matched to your blog template and design by doing it, you can change the alignment by accessing your blog template easily. If you wish to try it out on your blog, now it's your turn to follow steps.
Steps:
1. Go to your Blogger Dashboard.
2. Click on your Blog Title.
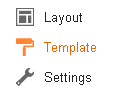
3. Jump to Template tab.
Note: Before editing your template, you may want to save a copy of it. Read How to Back Up Your Template.
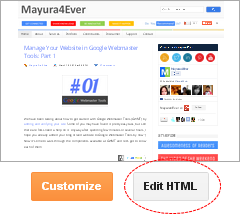
4. Click Edit HTML button.
5. Now search for following code in your template.
<div class='jump-link'>
6. Replace that tag with the one below.
<div class='jump-link' align='right'>
7. Preview your template.
8. Save Template after confirmation.
More Information:
* If you are interested in, you can convert jump break hyperlink into an eye catching image. If you need, read Turn Jump Break into an Image in Blogger.
More Information:
* If you are interested in, you can convert jump break hyperlink into an eye catching image. If you need, read Turn Jump Break into an Image in Blogger.
Enjoy :-)

hey , do you now how to change the color of the "Read More" text ?
Yeah. Replace,
<a expr:href='data:post.url + "#more"' expr:title='data:post.title'>
with
<a expr:href='data:post.url + "#more"' expr:title='data:post.title' style='color: [Your Color];'>
in your template mate :)
Cheers...
Thank you, thank you, thank you! Finally I have jump in my blog -couldn't stand it in left, and couldn't find the place to chance it before found your pictures. Thank you!
Hi Motoristin,
Great! You're most welcome dear :) I couldn't stand having it aligned to left either. Glad you have made it with the help of this tutorial.
Cheers...
Hi again, I have changed it to the right but my "Linkedwithin" also aligned to the right. Could you please recommend something to me for "Linkedwithin" alignment. Thanks.
Hi Baskan,
Looks like the LinkWithin widget might have falls into the same DIV. Did you try removing LinkWithin and installing it again?