


Lately we have been talking about changing or customizing Blogger header as you like with available options. However you can go beyond those limitations and add a whole new custom header for your blog if you need. If you are not much familiar with HTML or do not wish to spend more time on adding a custom headers, you might have to satisfied with available standard Blogger customization capabilities. If you consider about text displayed on header which are blog title and description, Blogger let you customize font and color of blog title and description via Template Designer. But does it let you change their text alignment?
As I mentioned earlier, currently Blogger let you customize blog title and blog description shown on your blog header via Template Designer. But it doesn't extent the capability of aligning text displayed on the header. So if you are looking for a way to resolve it, here you can find your simple answer. Here we just alter few CSS styles in the template to render header text with your specified alignment and it will help you to style your header as you would like it to be appeared.
Steps:
1. Go to Blogger Dashboard.
2. Click on your Blog Title.
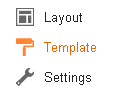
3. Jump to Template tab from left pane.
Note: Before editing your template, you may want to save a copy of it. Read How to Back Up Your Template.
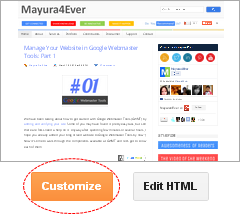
4. Click on Customize button.
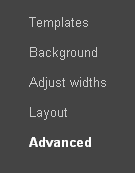
5. Now you will be directed to Template Designer. Jump to Advanced.
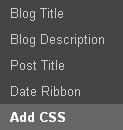
6. On the next pane, click on Add CSS tab.
7. Now add relevant CSS style from below, in the text area you find on the right pane.
Align Blog Title Text
.Header h1 {
text-align: [Alignment];
}
text-align: [Alignment];
}
Align Blog Description Text
.Header .description {
text-align: [Alignment];
}
text-align: [Alignment];
}
Color Indication Information:
- Alignment of Text
Here you have to specify text alignment. If you wanna align text to right, specify right here. Else if you wanna center it, specify center. By default, it's left aligned.
8. Click Apply to Blog button to make changes.
Enjoy :-)

thanks for the code, it was saving . but why when i use it the title disapear in ie but working fine in other browsers .. it is annoying :(
Hi Sepi,
You're welcome :) Can you let me know what Internet Explorer version you have been using to view your blog after placing code snippet in your blog?
Cheers...
thanx for the help.
i want to right align the menu bar. can you help?
Hi Imran,
You're welcome mate :) What do you refer as menu bar mate? Top navigation tabs?
Cheers...
I dont really understand. after step 1 and 2 under the 6th instructions, how to exactly to do the final step? needs clarifications
Hi Ryza,
You just need to click on Save Template button there.
Cheers...
Hi, how do you arrange photos side by side with same alignment?
Hi Leez,
For that matter, you need to familiar with HTML and use a custom header.
Cheers...
Nice help to set the alignment of the blog title text. Thank you!
Could you help with the following problem: I would like to have the blog title text on 3 separate lines, e.g.:
Title text 1
Title text 2
Title text 3
When creating the text, blogger does not accept "carriage return" (Enter) to jump to the next line. How could I do that?
Thank you
Hi Mate,
You're welcome and glad you could use a help over here :)
Well, in that scenario, you have to edit your template manually and make changes to the title. But I'd like to suggest having a custom header, so you can have title as you like with the help of HTML :)
Read How to Add a Custom Header in Blogger and if you have any questions related to that, please comment under that post mate :)
Hope it helps :)
Cheers...
Mayura - thank you for this idea and the link to your tutorial post. Seems like a good solution to get away from Blogger's restricted headers and create something of my own. I appreciate getting your answer so quickly. - There's another idea I am thinking about: Combining the header (image only) with the default Blogger tabs. That means: Hitting a tab and going to the corresponding page forces the header to display a new image. Hitting another tab would make the header display another image (not random). - Viable?? Any tutorials available??
Best regards
pp
You're welcome mate :) You will find more freedom available with custom headers.
As for your question, unfortunately, it's a kind of a complex process mate :) As Blogger offers the same header for every page, showing different header images for each page is difficult. You might be able to use jQuery or something to build it out, but HTML alone won't be helpful.
Sorry, I have no tutorial available for that process. But search online and see if you can find one :) If I can find something related, I'll let you know here.
Cheers...